Monday, November 27, 2006

Tug o' War: New lino cut


This is the first Tug o' War lino block proof.

I'm not sure, yet, how many prints I'll create for the final edition. The block is 8'' x 10''. I still have a little more cutting to do but overall I'm quite happy with the result. I probably could have completed this block a week or so ago but I'm working on two other lino projects and just couldn't seem to stay focused.

I'll have another print ready to share with you by the end of the week.

Sunday, November 26, 2006

A Simple Treasure


I've spent more time in the yard than I had planned, over the last two weekends, and feel like I need to catch up.

I know nothing at all about landscaping, but my front yard was long overdue for a complete purging. I've trimmed, cut back holly bushes and azalea trees; pulled up long forgotten roots and monkey grass, cleaned gutters and raked enough pine straw to be sick of it. A friend helped and without his vision (and his bush hog) I'd still be procrastinating.

The front of my house looks rather bleak and unwelcoming right now. I suppose that I should have waited until after the holiday season but I had put this off long enough! Once the holly bushes come back and I figure out what I want to plant for Spring . . .I'm sure that I'll look back and realize that it was worth the time and labor. I have a clean slate to work with and all I have to do now is plan and plant. I'm actually looking forward to playing in the dirt.

The picture that I have posted is one of a small nest that I found buried amongst the branches in one of the holly bushes located on the southeast corner of my house. The nest had long been abandoned. My first and only thought was to make every attempt to preserve it. It's as strong as it is brittle...and absolutely beautiful! Because the nest was supported by several branches, my friend was able to make a few strategic cuts with his chain saw and I was able to lift it in tack and bring it inside. I was so nervous! I'm agonizing about where to keep it in my house because I don't want it bumped. I thought about trying to drizzle some sort of liquid adhesive over it to keep it together but that's a really dumb idea. For the moment, I've placed it in my living room on a glass table surrounded by other found objects: a farmer's old egg basket, a stem of cotton with several cotton balls (boils) attached, art books and a couple of McCoy pots.

This afternoon I'll print my first proofs of the "Tug o' War" lino block, that I finished cutting last night. Check back in a couple of days, I'll share it with you on my next post.

Sunday, November 12, 2006

A beautifully framed lino block print!


I want to share with you a lino block print that I created, entitled "Pickin' ", which was purchased by a new patron. This print is 8" x 10" and is one of my favorite pieces. My patron was kind enough to take photos of the art after it had been framed. It's now hanging in his home gallery. The silver frame which he selected is stunning! Never, in a million years, would I have considered a silver frame.


He definitely has me thinking outside of the box now, with regard to frame selections. I'm so pleased that he gave me permission to post these photos. A heart felt "thanks" to him.


The image was first created as a needlepoint, a couple of years ago, and is one of a number of needlepoint canvases that falls under "The Sharecropper" series. Why do artists always work in series?? The needlepoint took forever to complete (almost 16 months). It was one of those projects that I loved when I started and then got tired of it. I needed instant gratification, and it was dragging on waaaaaaay too long!


I finally buckled down and decided that I needed to stop being distracted by so many other projects and I focused on it's completion, exclusively. A local craftsman handcrafted a custom frame from aged, oak barnwood. The overall size of the framed needlepoint canvas is 3' x 3'. It's impressive (if I may say so) and very heavy.

I may revisit this image, again, in another form. I'd like to see it as kitchen tile(s), a quilt, a silk scarf. . .so little time; so much to do!

Tuesday, November 07, 2006

New lino block cut


As I had mentioned in my first post, the boy with the slingshot was the first time that I had cut a block using an image of a male. I was pretty happy with the final print, so I thought that I'd create another block, for my portfolio...this time with two boys! Pretty ambitious. But when you're on a roll, ya gotta go with it!

I've taken a couple of pictures so that you can follow my progress. I've reworked the pencil sketch several times. The first picture shows a portion of the sketch before I trace it onto the 8" x 10" block. Most of my work is usually formatted vertically but this image will be horizontal. In the second picture, you can see that I've started carving around the gourds in the background. The tracing outline is in red because I've used Saral transfer paper which is a type of lightweight graphite paper.

I don't have any idea how long it will take to completely cut the block. If I can work on it every evening for a couple of hours, without too many distractions, I should be ready to print by the weekend. Right now I'm jumping between trying to get this post done and watching the voting results, locally and nationally.

Thursday, November 02, 2006

So little time; so much to do!

Well, I thought that I had this blogging thing down to a science. I don't. Geez. It has taken me almost 20 minutes to figure out how to get to this blogspot posting page, to create this post. I'm already tired.

Before I begin, let me say "thanks" to all who have offered a comment and a word or two of encouragement.

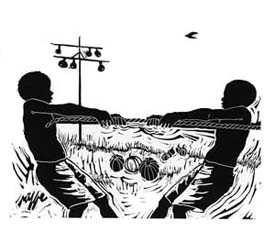
Okay, I thought that I was going to walk you thru my lino block cutting process but it has just hit me that I don't have any visuals. Hmmmmmm, maybe I'll start by mentioning a few of the supplies that I use. Lots of folks have helped me along the way, so I'm really happy to share this info with 'yall. I think that all creative individuals should make every attempt to take the mystery out of a procedure or technique, as much as possible. Each one; teach one.

Currently, I buy all of my blocks already mounted. I'm partial to the 8'' x 10'' golden-cut blocks, not the gray. I usually purchase them from the local art store, but I'm starting to realize that I might save a few dollars by ordering in bulk, on-line, especially since I buy a half dozen each time. The down side is that if I purchase on-line I will not have the ability to run my hand over the surface of each block. I've had to learn the hard way about small nicks and/or indentations. The least little bump or scratch on a fresh block can cause you a lot of angst when you have completed your cutting and discover that the one place on the block that you want inked. . .is below the surface of the block. . .and you end up with six fingers on an image or a third eye. Not a good feeling.

Last March, I invested in a wonderful table top press manufactered by the Conrad Machine Company. It's heavy...and perfect. Solid steel with a diamond star wheel handle and a 12''W x 24"L x 1/2'' thick bed plate. No more spoon rubbings for me (although I must admit that I miss the physical component of hand printing)! When I placed my order for the press, thru Dick Blick, I was extremely disappointed when I was told that it would take up to nine weeks for delivery. Nine weeks?!! That seemed like an eternity to me. However, the best thing about the long wait was that it forced me to start cutting the blocks. I didn't need a press to cut blocks and, hey, it was going to put me way ahead of the game, right? Wrong. Little did I realize that I had been away from cutting lino blocks for so long, I had lost my feel for the material. When I wanted to cut a curve in my design, the blade slipped. When I needed to cut an angle, the blade slipped. Major dilemma. I ended up taking a couple of blocks and practiced cutting until I found my "hand" again. It was the best thing that I could have done for myself. Practice makes perfect, right?

Before I bought my press, I used black Speedball water soluble block printing ink and, occasionally, used a bamboo baren instead of the back of a spoon for the burnishing. The wash-up was fairly simple. While still waiting for the press to arrive, I had the good fortune of talking with a printer/artist at a local art festival who used oil based ink for all of his prints. The coverage on his prints was soooo rich! So I switched. I now use Daniel Smith Traditional Relief Black #79. Nothing else. I love this stuff! Oh, and I no longer clean my blocks. After printing my edition, I'll usually run the block thru the press several times covered with newspaper and will continue to pull prints (on the newspaper) until I can no longer see an impression. Then I'll let the block air dry for a couple of days before I print again or cut away more of the surface.

My tools are basic Speedball linoleum cutters that I use with a Speedball handle. I apply my ink with a hard rubber roller. I have several rollers of varying widths but I'm partial to a 4"W roller that I've owned since I was an undergrad student...a lifetime ago. So little time; so much to do!